Cognito
Create a Cognito User Pools Authorizer
Background
Amazon API Gateway can use the JWT tokens returned by Cognito User Pools to authenticate API calls. In this step you’ll configure an authorizer for your API to use the user pool you created in User Management.
High-Level Instructions
In the Amazon API Gateway console, create a new Cognito user pool authorizer for your API. Configure it with the details of the user pool that you created in the previous module. You can test the configuration in the console by copying and pasting the auth token presented to you after you log in via the /signin route of your current website.
-
Under your newly created API, choose Authorizers.
-
Choose Create New Authorizer.
-
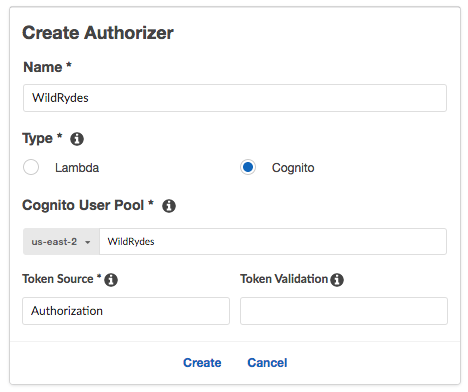
Enter
WildRydesfor the Authorizer name. -
Select Cognito for the type.
-
In the Region drop-down under Cognito User Pool, select the Region where you created your Cognito user pool in the User Management module (by default the current region should be selected).
-
Enter
wildrydesin the Cognito User Pool input, the name will auto-complete and allow you to select the name of the user pool that was generated when the user pool was created. -
Enter
Authorizationfor the Token Source. -
Choose Create.
Verify your authorizer configuration
-
Open a new browser tab and visit
/rideunder your website’s domain. -
If you are redirected to the sign-in page, sign in with the user you created in the last module. You will be redirected back to
/ride. -
Copy the auth token from the notification on the
/ride, -
Go back to previous tab where you have just finished creating the Authorizer
-
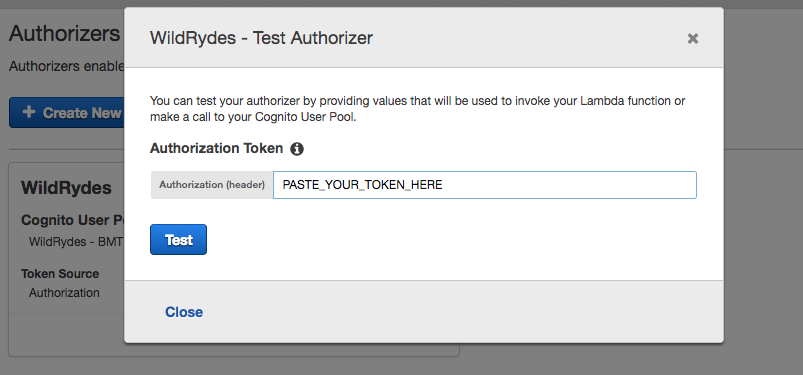
Click Test at the bottom of the card for the authorizer.
-
Paste the auth token into the Authorization Token field in the popup dialog.
-
Click Test button and verify that the response code is 200 and that you see the claims for your user displayed.